Hello, friend! If you've ever stood in a small dining room or looked at a tiny coffee table and thought, 'There is absolutely no room for a big, beautiful Christmas centerpiece here,' then you are in the right place. When we first moved into our fixer-upper, the dining 'room' was more of a dining 'nook,' and I felt that exact same way. I'd scroll through pictures of magnificent, sprawling tablescapes and feel a little sigh escape. But over the years, I've learned a secret: a stunning centerpiece isn't about size; it's about creating a moment, a festive focal point that draws you in and says, 'Christmas is here.'
In a small home, every square inch counts. We can't afford to have something that just takes up space. Our decor has to be intentional, beautiful, and functional. The good news is that creating a gorgeous Christmas centerpiece in a compact space is not only possible, it can actually be more charming and intimate. It’s all about clever design, playing with height and texture, and choosing elements that pack a festive punch without the footprint.
So, let’s walk through some of my favorite ideas together. These are designs I’ve used and loved in my own home, adapted for small tables, tight budgets, and real life. We're going to create something that feels special, personal, and perfectly scaled for the heart of your home.
The Foraged Evergreen Runner
This is my go-to for our narrow rectangular dining table. It delivers that classic, lush Christmas feel without taking up a ton of width, which is crucial when you need room for plates and glasses. The beauty of this design is its organic, slightly wild feel—it’s perfectly imperfect.
The Vision: Imagine a low, flowing carpet of fresh greenery running down the center of your table, dotted with natural textures and warm light.
The Materials & Colors:
- Greens: Start with a base of long-lasting evergreens. Cedar is my absolute favorite because it drapes so beautifully. Fir and pine work wonderfully, too. If you can, forage these from your backyard or a friend's (always ask permission!). A few bunches from a local tree lot or even Trader Joe's are very affordable. For a modern twist, weave in some seeded or silver dollar eucalyptus for a soft, blue-green contrast.
- Texture: This is where it gets fun. I tuck in pinecones of various sizes—some small, some sugar pine—for that rustic, woodsy feel. Dried orange slices add a gorgeous, almost stained-glass glow and a lovely subtle scent. You can make your own by baking thin slices at a low temperature for a few hours. A handful of cinnamon sticks tied in little bundles with twine adds another layer of texture and holiday aroma.
- Pops of Color: For a classic look, tuck in small bunches of faux cranberry or holly branches. The bright red against the deep green is timeless. If you prefer a neutral palette, you could use dried baby's breath or white-painted pinecones.
- Light: Nestle a set of battery-operated, warm-white fairy lights on a thin copper or silver wire throughout the greens. They add a magical twinkle without the worry of a flame.
Placement & Execution:
- Start by laying your longest branches down the center of the table, overlapping them to create a continuous line. Don't worry about it being perfectly symmetrical.
- Next, layer in your secondary greens, like eucalyptus, to fill in gaps and add a different texture.
- Strategically place your larger elements, like pinecone clusters. Then, scatter the smaller bits, like the orange slices and cinnamon bundles.
- Finally, weave the fairy lights through the arrangement, tucking the battery pack discreetly at one end.
Practical Notes:
- Budget-Friendly: Foraging is free! If you can't forage, a single 'garland bunch' from a garden center is often enough for a small table runner.
- Renter-Friendly: This requires no hooks, nails, or permanent fixtures. It rests directly on your table (use a protective runner underneath if your table is sensitive).
- What to Avoid: Don't make it too tall. The beauty of this design is that it's low, so guests can easily see and talk to each other across the table.
- Make it Last: If using fresh greens, give them a good spritz with water every couple of days to keep them from drying out too quickly.
The Contained Cloche Wonderland
This centerpiece is pure magic, especially if you have a round dining table, a small coffee table, or even an entryway console that needs a festive touch. It’s a tiny, perfect world under glass, and it's completely protected from dust, pets, and curious little hands.
The Vision: A miniature snow-covered forest scene, captured under a glass dome, twinkling with its own tiny lights.
The Materials & Colors:
- The Vessel: A glass cloche or bell jar is the star. You can find these at craft stores, home goods stores, or even thrift shops. Choose a size that feels substantial but doesn't swallow your whole table. A simple round wooden base adds warmth.
- The Scene: The key is to play with scale. I love using a collection of bottle brush trees in varying heights and shades of green, white, or even blush pink for a whimsical look. Add a tiny ceramic house or a miniature deer figurine to create a focal point.
- The Ground: A generous layer of faux snow or even coarse salt creates the perfect wintery base. The fluffy texture looks so realistic under the glass.
- The Light: A short strand of battery-operated fairy lights is essential. The lights reflect off the glass, amplifying the sparkle and creating a cozy, contained glow.
- Color Palette: For a serene look, stick to whites, greens, and metallics. For something more playful, use colorful bottle brush trees.
Placement & Execution:
- Place your base where the centerpiece will live.
- Arrange your tallest item (usually the largest tree or the house) slightly off-center.
- Build the rest of the scene around it, clustering smaller trees and your figurine. Think like a landscape designer—create depth and interest.
- Sprinkle the faux snow generously around the base of your items, covering the bottoms and creating soft drifts.
- Weave in your fairy lights, making sure the 'on' switch is accessible near the back.
- Carefully place the glass cloche over the top.
Practical Notes:
- Budget-Friendly: Bottle brush trees and miniature figurines are very inexpensive at craft stores, especially after Halloween. You can often find cloches at secondhand stores.
- Kid & Pet-Friendly: This is my top recommendation for tables with kids. The precious scene is safely under glass!
- What to Avoid: Don't overcrowd it. The negative space is just as important as the objects themselves. You want it to feel like a peaceful little world, not a cluttered snow globe.
The Vertical Glow Cluster
When you can't build out, build up! This design is incredibly elegant, dramatic, and takes up very little surface area. It's perfect for adding height and sophisticated ambiance to your holiday table. It works beautifully on its own or surrounded by a few simple evergreen sprigs.
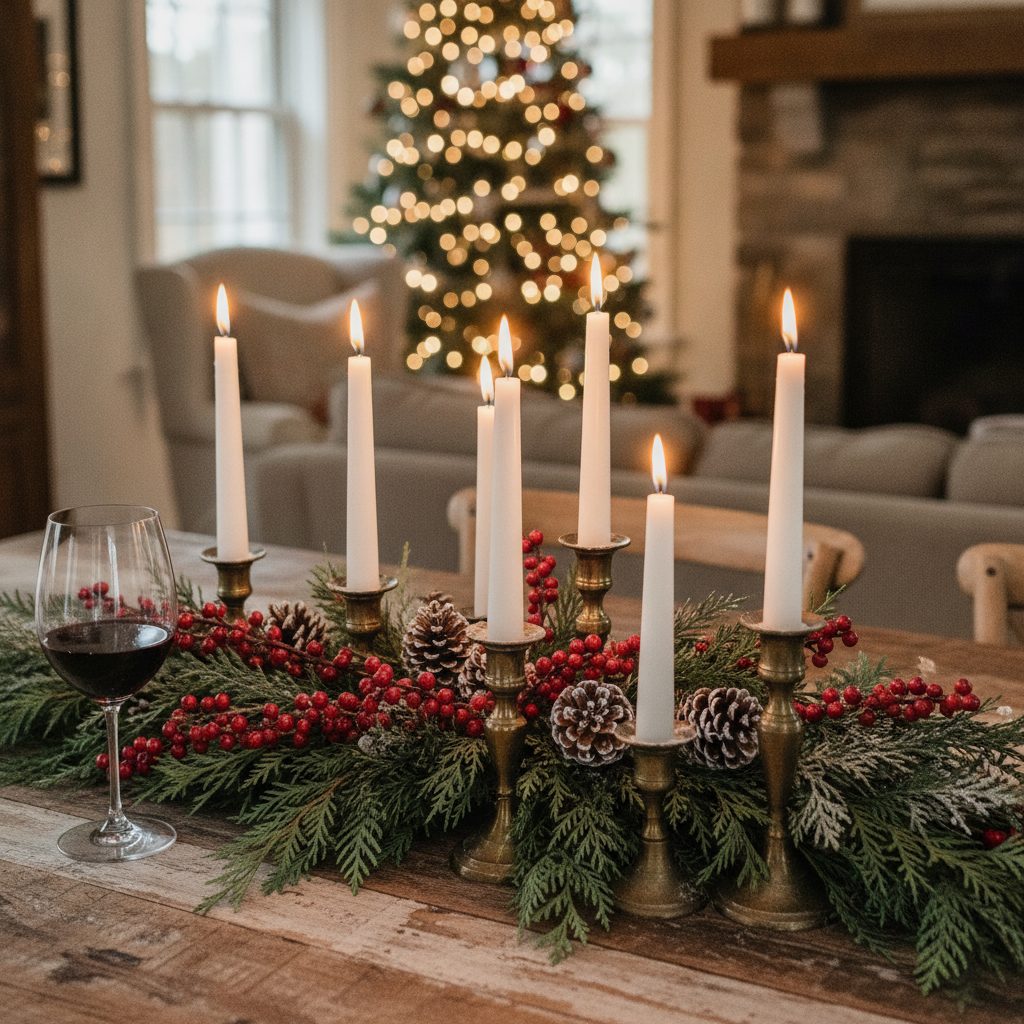
The Vision: A collection of flickering candles at varying heights, creating an architectural and warm focal point.
The Materials & Colors:
- Candlesticks: The magic here is in the mix. I collect mismatched candlesticks from thrift stores and antique malls all year long. Look for different materials—antique brass, dark wood, clear glass, mercury glass. The variety is what makes it interesting. Aim for a collection of 5 to 7 candlesticks of varying heights.
- Candles: Classic ivory or white taper candles always look elegant. For a moodier, more modern vibe, try candles in a deep forest green, burgundy, or even black.
- The Base: Group the candlesticks on a round, heat-proof tray. A simple gold or black metal tray works perfectly. This contains the arrangement, protects your table, and makes it easy to move if you need the space.
- Accents (Optional): You can leave it simple or weave a few small sprigs of rosemary or cedar around the base of the candlesticks for a touch of green.
Placement & Execution:
- Arrange your candlesticks on the tray, placing the tallest one in the center or slightly to the back.
- Cluster the remaining holders around it, ensuring you have a pleasing variety of heights. It should feel like a little city skyline of light.
- Secure your taper candles in the holders. (A little tip: if a candle is too thin, melt the bottom wax slightly and hold it in place until it sets, or wrap the base with a tiny bit of foil for a snug fit).
- If using, tuck your greenery around the bases.
Practical Notes:
- Budget-Friendly: Thrift stores are your best friend. A brass candlestick that costs $20 new can often be found for $2 secondhand. A little polish and it's good as new!
- Safety First: If you have small children, pets, or just a lot of activity around the table, I highly recommend using high-quality flameless LED taper candles. They have incredibly realistic flickers now and offer total peace of mind.
- What to Avoid: Don't line them up in a straight row like soldiers. The clustered, organic grouping is what creates the high-end, designer look.
The Edible Elegance Board
Why not have a centerpiece you can eat? This is the ultimate in functional decor for a small space. It's a feast for the eyes before becoming a feast for the stomach, making it perfect for holiday parties, Christmas Eve appetizers, or even a festive dessert display.
The Vision: A bountiful, overflowing board filled with the colors, textures, and flavors of the season, arranged like a work of art.
The Materials & Colors:
- The Board: A large wooden cutting board or a marble slab serves as your canvas. The natural material adds warmth and texture.
- The Edibles: This is all about abundance. Think seasonally!
- Fruits: Deep red pomegranates (broken open to show the jewels inside), dark grapes, sliced pears, sugared cranberries.
- Cheeses: A mix of hard and soft cheeses, like a sharp white cheddar, a creamy brie, and maybe a cranberry-encrusted goat cheese for color.
- Sweets & Nuts: Gingerbread cookies, candied pecans, dark chocolate bark with peppermint, roasted almonds.
- Greenery: Sprigs of fresh rosemary are perfect for tucking in between items. They look like miniature pine branches and add a wonderful scent.
- Color Palette: Let nature do the work! The deep reds of the fruit, the creamy whites of the cheese, the rich brown of the nuts, and the vibrant green of the rosemary create a stunning, natural palette.
Placement & Execution:
- Start by placing your largest items on the board first—the wheel of brie, a small bowl of olives, etc. These are your anchors.
- Arrange the crackers and sliced cheeses around your anchors.
- Now, fill in all the gaps with the smaller items: handfuls of nuts, clusters of grapes, berries, and cookies. The goal is to cover almost the entire board so it looks incredibly lush and full.
- Finish by tucking in the sprigs of fresh rosemary for that final festive touch.
Practical Notes:
- Budget-Friendly: You're likely already buying many of these foods for holiday gatherings. This just presents them in a beautiful, centerpiece-worthy way.
- Make-Ahead: You can prep many of the elements ahead of time, but it's best to assemble the board right before guests arrive to keep everything fresh.
- What to Avoid: Don't leave too much empty space on the board. The feeling of abundance is key to making this feel special and intentional, rather than just snacks on a plate.
Small Space Centerpiece Secrets
Beyond these specific ideas, here are a few core principles I always come back to when decorating our compact home for the holidays.
-
Use a Tray. This is my number one tip. By containing your entire centerpiece—whether it's candles, a cloche, or a collection of small vases—on a tray, you create a defined, intentional look. More importantly, you can lift the entire thing off the table in one go when it's time to serve dinner. It's instant space-saving!
-
Hang It Up! Who says a centerpiece has to be on the table? The ultimate space-saver is to draw the eye upward. Hang a simple, lightweight wreath or a branch decorated with ornaments from the light fixture over your table. Use clear fishing line for a floating effect. For renters, a sturdy ceiling Command Hook can often do the trick without any damage.
-
Go Low-Profile. As we discussed with the evergreen runner, a low centerpiece is crucial for conversation. It keeps the space feeling open and airy. You want to connect with your loved ones across the table, not peer at them through a forest of decor.
-
The Deconstructed Look. Instead of one central arrangement, try a series of small, coordinating items. A line of five tiny bud vases, each with a single sprig of holly or a white ranunculus, can look incredibly chic and takes up almost no room. You can easily arrange them around your serving dishes.
Frequently Asked Questions
Q: How do I make my fresh greenery centerpiece last through the whole season?
A: Great question! First, choose long-lasting greens like cedar, fir, and pine. Before arranging, give the stems a fresh cut and soak them in water for a few hours. Keep the arrangement away from direct heat sources (like vents or fireplaces). Finally, mist it with water every day or two. This little bit of humidity makes a huge difference!
Q: I have kids and I'm worried about breakable items. What's the best option?
A: Safety and peace of mind are everything! The Contained Cloche is fantastic because it keeps everything protected. The Foraged Runner is also a great choice, as it's soft and doesn't have many breakable parts (just skip any glass elements). And always, always opt for flameless LED candles over real ones when little ones are around.
Q: My style is more minimalist. How can I create a centerpiece that isn't over the top?
A: I love this. A minimalist centerpiece can be so powerful. Try the Vertical Glow Cluster with simple white candles on a clean, black tray. Or, place a single, beautiful wooden bowl in the center of your table and fill it with pinecones. Less is truly more when the items you choose are beautiful and intentional.
Q: How do I store all these centerpiece elements after Christmas?
A: Thoughtful storage is key to enjoying your items year after year. I wrap any breakable candlesticks or figurines in bubble wrap or tissue paper. Faux greens and florals can be stored in a large plastic tub to prevent them from getting crushed. For fairy lights, I wrap them around a piece of cardboard to avoid a tangled mess next year.
I hope these ideas leave you feeling inspired and empowered to create a beautiful Christmas centerpiece, no matter the size of your table. Remember, the goal is to create a space that feels like you, a space that feels warm, welcoming, and full of holiday cheer. Start small, choose elements you love, and enjoy the simple, beautiful process of making your home a little more magical this season.